
Blanching peas for 1.5 minutes in boiling water followed by an immediate ice bath stops enzyme activity that would otherwise turn your harvest into bland, mushy, discolored peas within 3 months of freezing.
The Morning I Lost a Season's Worth of Peas
It was June 2022, 6:30 AM at Roots & Refuge Farm. I had just picked 14 pounds of shelling peas — Sugar Ann snap peas and Wando shelling peas — both varieties I'd succession planted in early March. The dew was still heavy on the trellis. My hands were green-stained from stripping vines.
I brought them into the kitchen, shelled them all at once (big mistake), and blanched them for 3 minutes because that's what I'd always done for green beans. I figured "green vegetable = same rules."
Three months later, I opened a bag for winter soup. The peas were gray-green, mushy, and tasted like canned peas from a school cafeteria. My kids refused to eat them. I had to compost 12 quarts of what should have been February's sweetest treasure.
That's when I learned: peas are not green beans. They have thinner skins, higher sugar content, and zero tolerance for heat abuse. The difference between a perfect frozen pea and a sad one is exactly 1.5 minutes.
Why Blanching Matters for Peas Specifically
Peas contain enzymes — lipoxygenase and peroxidase — that continue breaking down sugars, chlorophyll, and cell structure even after harvest. Freezing slows these enzymes but does not stop them. Without blanching, frozen peas degrade in three ways:
| Problem | Unblanched Peas | Blanched Peas |
|---|---|---|
| Color | Fades to gray-green within 2-3 months | Stays bright green for 10-12 months |
| Texture | Becomes mealy and waterlogged | Maintains firm, pop-in-your-mouth structure |
| Flavor | Loses sweetness, develops "hay" taste | Retains sweetness for full freezer year |
| Freezer shelf life | 2-3 months acceptable quality | 10-12 months acceptable quality |
The science is straightforward: boiling water at 212°F denatures the enzymes that cause degradation, while the rapid ice bath stops the cooking process before heat penetrates to the interior. For peas, which are small and have thin skins, the heat transfer happens fast — which is why the window is so narrow.
What I Used to Think (My Early Mistake)
For my first three years of gardening, I didn't blanch peas at all. I'd read in a 1970s gardening book that "peas freeze well without blanching." That might have been true for the tough, starchy field peas grown 50 years ago. Modern garden peas — especially sugar-enhanced varieties like Sugar Ann, Cascadia, and Wando — are bred for sweetness. That sweetness comes from higher sugar content, which makes them more vulnerable to enzymatic breakdown.
I wasted two harvests learning this. The first year I didn't blanch: mushy peas by January. The second year I over-blanched: mushy peas by October. The third year I got it right.
The Method That Works Every Time
Equipment You Need
- Large pot (8-quart minimum) with lid
- Slotted spoon or mesh strainer
- Large bowl filled with ice and water
- Kitchen timer (phone timer works)
- Clean dish towels or salad spinner
- Baking sheet for flash-freezing
- Freezer bags or vacuum sealer
Step-by-Step Process
Step 1: Pick at the right time
Harvest peas in the morning when temperatures are below 75°F. Sugar content is highest at dawn. If you pick in afternoon heat, sugars have already started converting to starch. I pick between 6:30 and 8:00 AM during June.
Step 2: Shell immediately before blanching
Do not shell peas and let them sit. Once the pod is opened, the peas are exposed to oxygen and enzyme activity accelerates. Shell only as many as you can blanch in one batch. I shell one pound at a time, blanch it, then shell the next pound.
Step 3: Bring water to a full rolling boil
Fill your pot at least 2/3 full with water. No salt. No baking soda (that old trick destroys texture). Bring to a vigorous boil — large bubbles that don't stop when you stir.
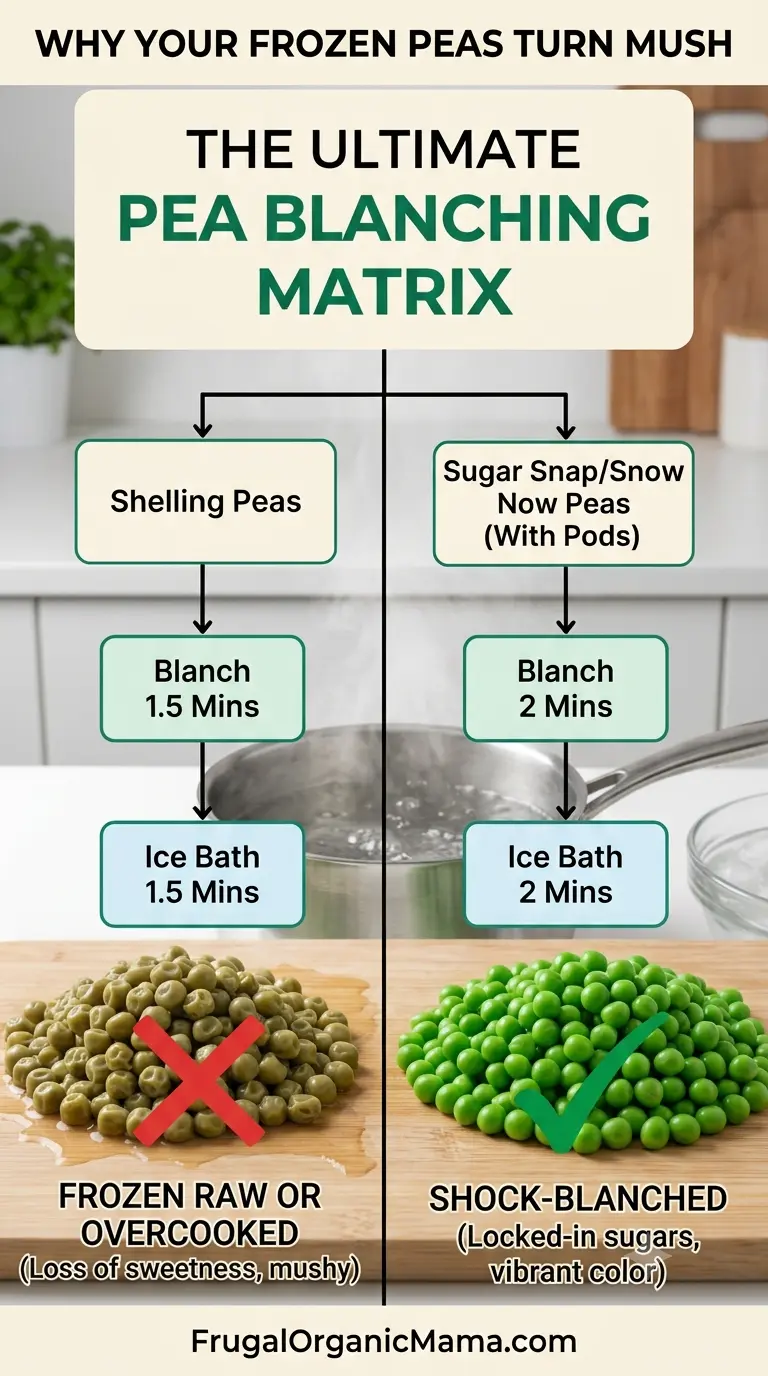
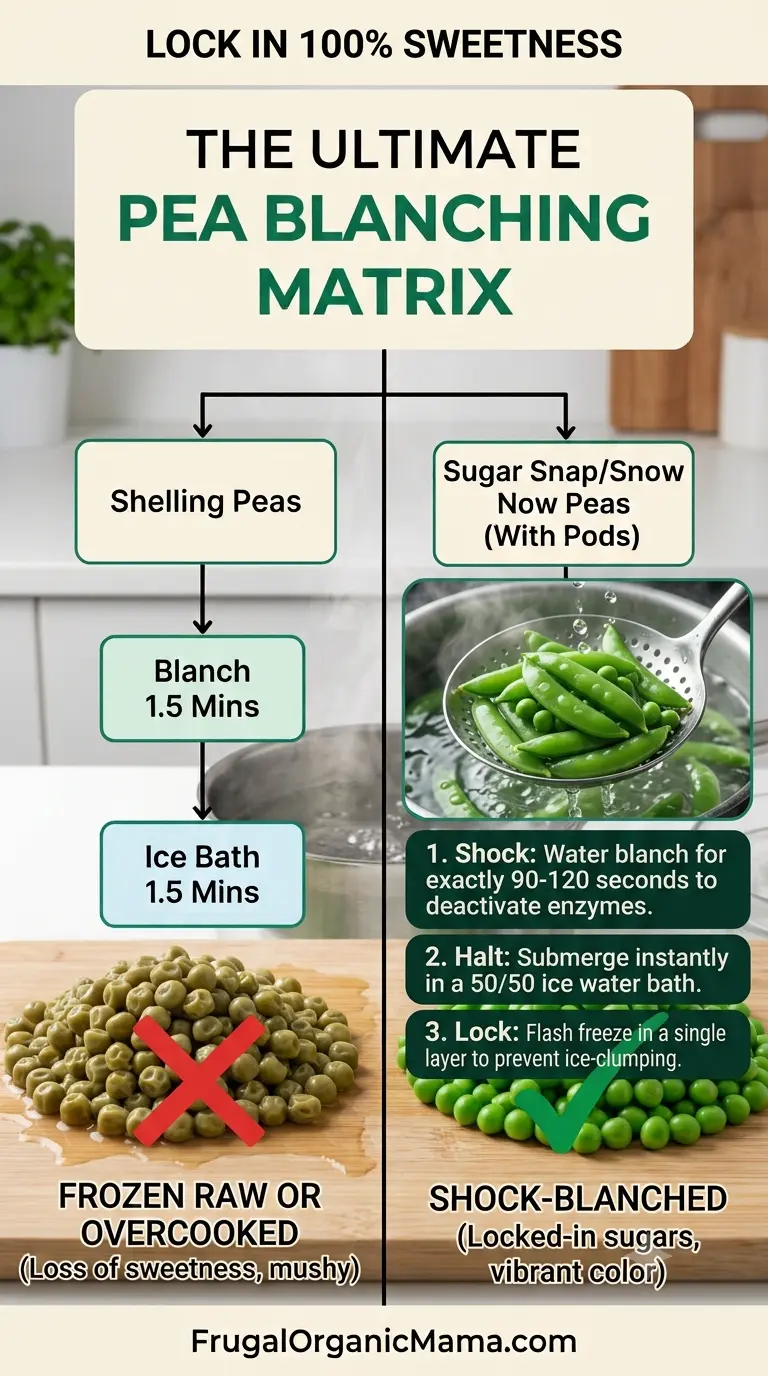
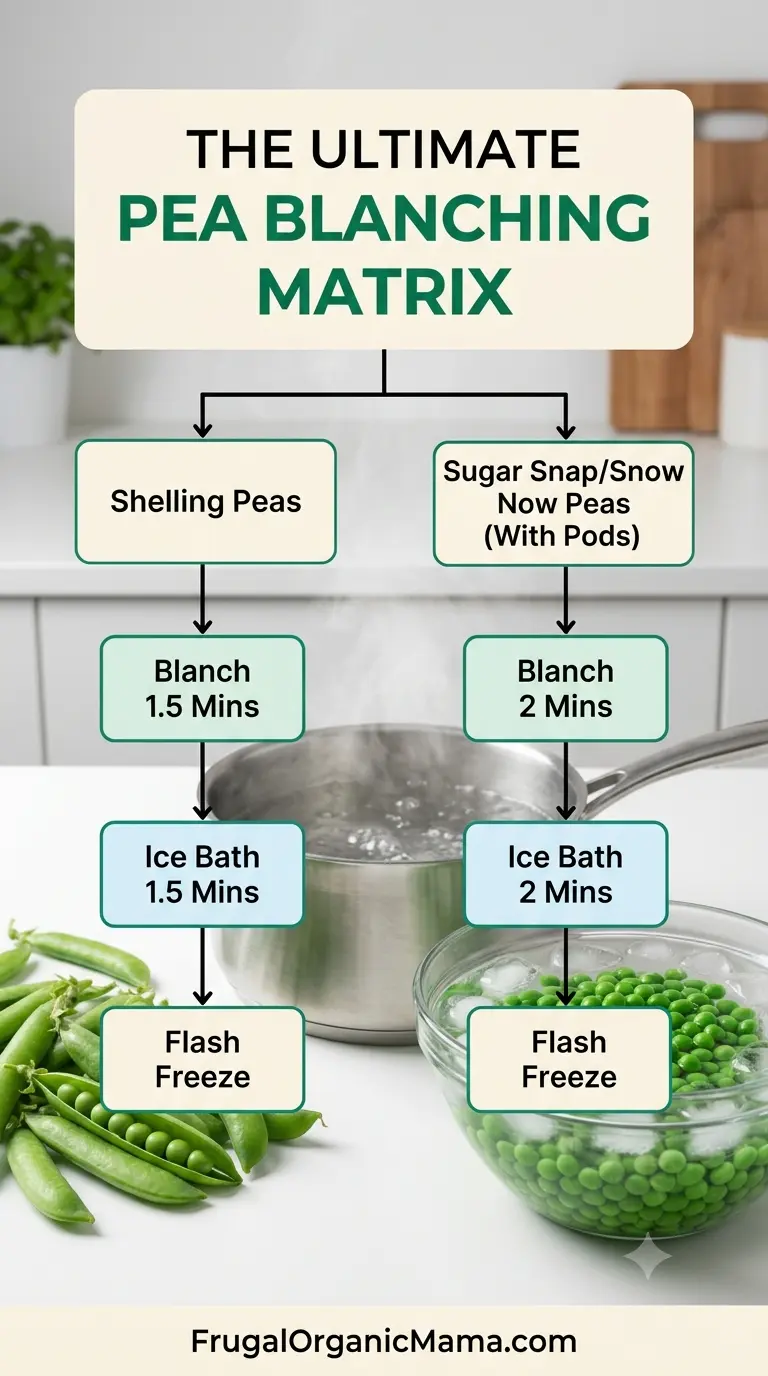
Step 4: Blanch for exactly 1.5 minutes
Drop shelled peas into boiling water. Start your timer immediately. Stir once to ensure even heat distribution. Cover the pot to maintain temperature. At exactly 1.5 minutes, stop.
If you live above 3000 feet, add 1 minute to all blanching times — water boils at a lower temperature at elevation, which means enzymatic deactivation takes longer.
Step 5: Ice bath for 1.5 minutes
Immediately transfer peas to ice water using a slotted spoon. The water should be icy enough that you can feel the cold through the strainer. Leave for exactly 1.5 minutes. Stir once to ensure all peas contact cold water.
Step 6: Drain and dry thoroughly
Spread peas on a clean dish towel. Pat dry. Or use a salad spinner — this is faster and more effective. This step is not optional. Water on the surface of frozen peas creates large ice crystals that rupture cell walls. Dry peas freeze as individual pearls; wet peas freeze as a solid block.
Step 7: Flash freeze on a baking sheet
Spread dried peas in a single layer on a parchment-lined baking sheet. Freeze for 2-3 hours until individual peas are hard. This prevents them from freezing into a clump.
Step 8: Bag and seal
Transfer frozen peas to freezer bags or vacuum-seal bags. Remove as much air as possible. Vacuum sealing extends quality to 14-18 months; standard freezer bags with pressed-out air give 10-12 months.
Comparison: Blanching Methods for Peas
| Method | Time | Texture Result | Best For |
|---|---|---|---|
| Boiling water (standard) | 1.5 min | Firm, bright, sweet | Freezing for soups, sides, stir-fry |
| Steam blanching | 3 min | Slightly firmer, less nutrient loss | When you want maximum vitamin retention |
| Microwave blanching | 2-3 minutes | Uneven, some peas overcooked | Only if you have no stove (not recommended) |
| No blanching | 0 | Gray, mealy, bland within 3 months | Only if you'll eat within 6 weeks |
Steam blanching takes longer than boiling (3 minutes vs 1.5 minutes). It preserves slightly more vitamin C — about 5-8% more than boiling. But the texture difference is minimal, and boiling is faster. I use boiling for 90% of my pea harvest.
Who This Method Is For
This method is for you if:
- You grow shelling peas, snap peas, or snow peas and want them to taste fresh in February
- You've had frozen peas turn gray or mushy and want to fix it
- You're new to food preservation and want a reliable, repeatable process
- You garden on a budget and can't afford to waste a harvest
This method is not for you if:
- You plan to eat all your peas within 6 weeks of harvest (refrigeration is fine)
- You're canning peas (peas require pressure canning, not water bath — different process entirely)
- You're dehydrating peas (different preparation needed)
What Not to Do
Don't blanch snow peas or sugar snap peas the same way. These have edible pods and thinner cell structure. Blanch them for 60 seconds, not 90. The pods will become limp if over-blanched.
Don't skip the ice bath. I tried "cool running water" once during a drought when ice was scarce. The peas continued cooking from residual heat and ended up with a mealy texture. Cold water stops the cooking instantly; cool water only slows it.
Don't blanch more than 1 pound per gallon of water. Adding too many peas at once drops the water temperature below boiling. The blanching time effectively resets, and you end up with uneven results. Work in batches.
Don't salt the water. Salt pulls moisture out of peas and makes them tough. Save salt for the cooking pot when you're ready to eat them.
Don't use baking soda. Some old recipes recommend adding baking soda to preserve green color. It works — by destroying cell structure. The peas turn to mush within months. The bright green is temporary; the ruined texture is permanent.
My Final Recommendation
Blanch peas for exactly 1.5 minutes in boiling water, then 1.5 minutes in an ice bath. Dry thoroughly. Flash freeze on a baking sheet. Vacuum seal if possible.
This method has given me perfect peas every time for five years running. I open bags in February that taste like June. My kids eat them straight from the bag as snacks — frozen peas are a legitimate treat when they're blanched correctly.
The 1.5-minute window is non-negotiable. Set a timer. Don't guess. Your future winter self will thank you.
Related Reading
- How to Blanch Vegetables for Freezing — Universal method covering all vegetables
- How to Blanch Broccoli — 3-minute florets with split timing for stems
- How to Blanch Green Beans — The vegetable everyone compares peas to
- How to Freeze Garden Vegetables — Freezing guide for your full harvest
- Why Blanching Prevents Freezer Burn — The enzyme science behind every blanch
- Blanching Hub — All blanching guides, tool access, and vegetable-specific times in one place