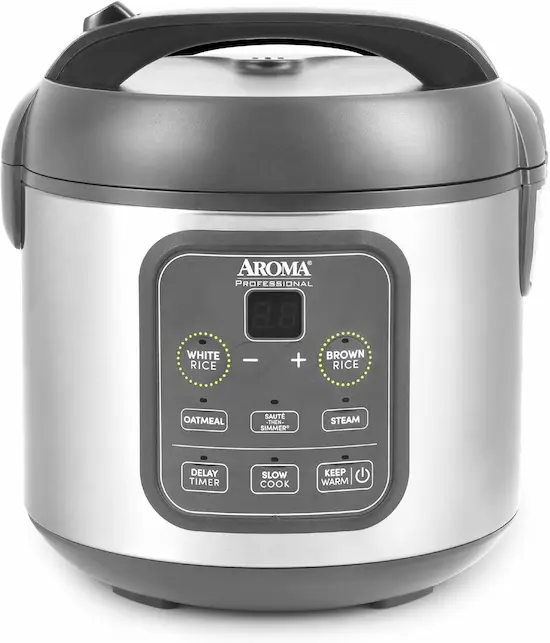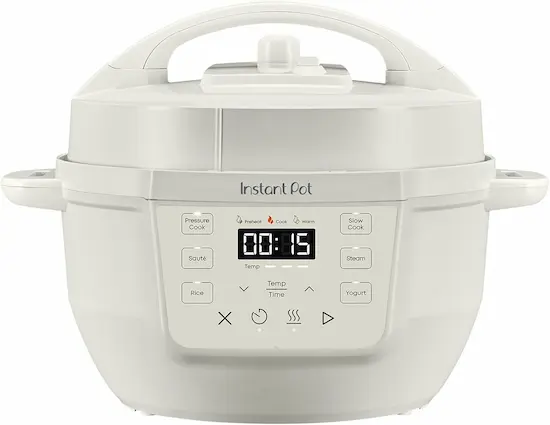
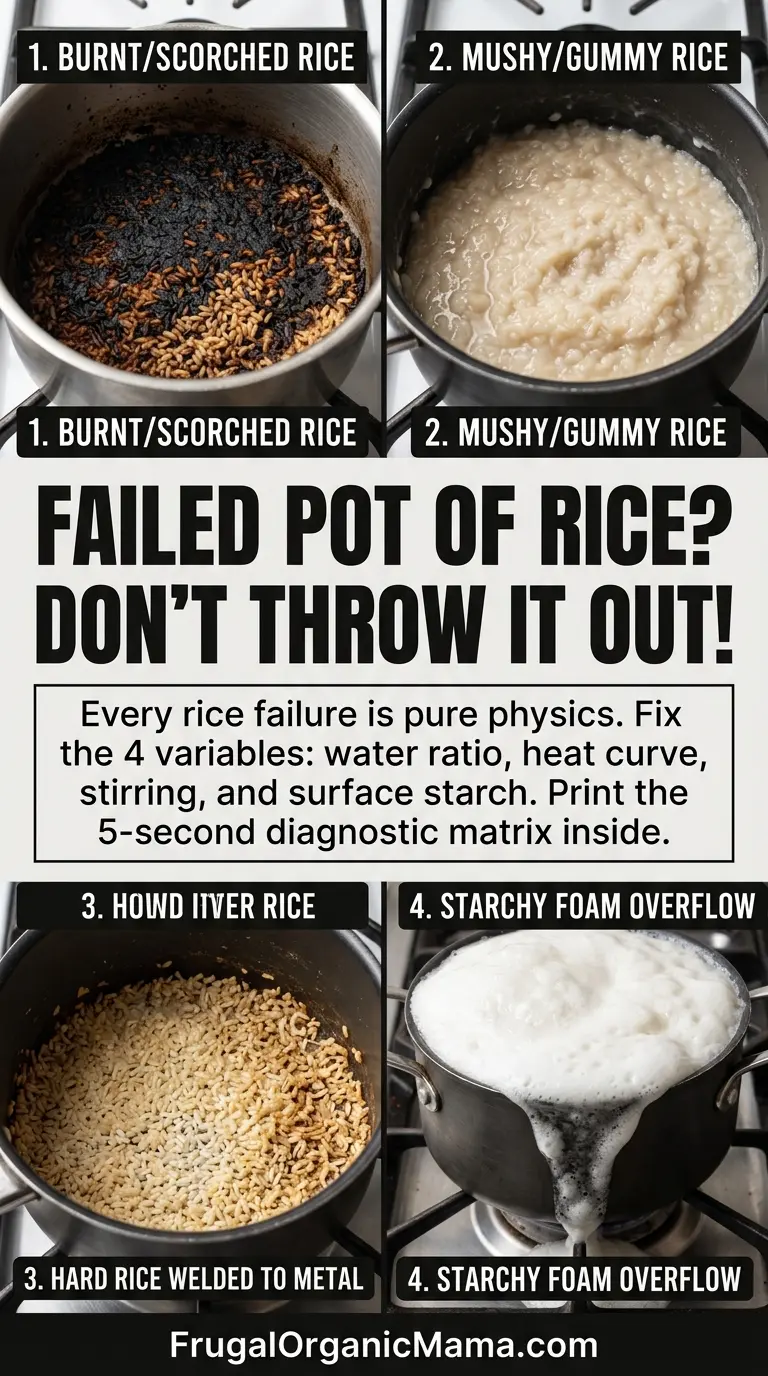
There's a moment every home cook knows. You lift the lid, expecting billows of steam and perfect, separate grains. Instead, you find one of four things: a cement-like layer welded to the bottom of the pot, a gluey mound that clings to the spoon, scorched grains with a bitter brown crust — or, if you walked away at the wrong moment, a starchy foam bubbling over the lid and hissing across the stove.
And the first thought is almost always the same: What did I do wrong?
Here's what I want you to know before we go anywhere else: a failed pot of rice is data, not a verdict. You didn't fail a personality test. You didn't lose the rice lottery. You changed one variable in the cooking process, and the rice responded exactly as the physics dictated. Every rice failure is the same physics with a different symptom — and each symptom points to one of four measurable variables: water ratio, heat curve, agitation, and how much surface starch you left on the grain.
Fix the variable, and the symptom disappears. That's the whole game. Let me show you how to read the signals.
Here's the frame I want you to keep for the rest of this article: Rice is a chemistry experiment where water is the only dial that matters most. Four symptoms, four variables: sticks = not enough water, mushy = too much water, burned = heat too high too long, boiled over = too much starch + trapped steam. Find the symptom, fix the variable, rest the pot — and rice stops being a gamble.
The Quick Diagnostic Table
Bookmark this. Print it. Tape it inside a cabinet. This is the whole article in four rows.
| Symptom | Which Variable Is Off | Why It Happens | The Fix |
|---|---|---|---|
| Sticks to the bottom | Water ratio too low + heat too high | Surface starch dries out and bonds to hot metal before gelatinization finishes | Increase ratio to the correct value for your grain + device, drop to LOW after the first boil, stop stirring, rest 10 minutes |
| Mushy / gummy / split | Water ratio too high (or stovetop ratio used in a pressure cooker) | Starch granules rupture and flood the cooking liquid with amylose gel | Cut the water to the device-appropriate ratio, never stir long-grain, rest properly |
| Burned / scorched bottom | Heat never dropped after the boil | Bottom water evaporates; starch caramelizes and scorches on hot metal | Lower the heat instantly after the first boil, use the correct ratio, rest the pot |
| Boils over / overflows | Too much surface starch + trapped steam | Starchy foam builds under a tight lid, steam lifts it over the edge | Rinse rice 2–3 times, reduce heat, crack the lid until the foam settles |
Perfect rice starts with the right ratio — get yours.
The Rice Water Ratio Calculator gives the exact water for your grain, quantity, and device, so you stop guessing and start cooking.
The Starch Science: Why Rice Behaves This Way
Rice is mostly starch — typically 75–80% of its dry weight — and starch is where all four of our symptoms live. When you cook rice, you're not just boiling a grain; you're driving a process called starch gelatinization. The starch granules inside each grain absorb water, swell, and eventually soften into an edible structure. That process needs exactly two things: enough water and enough heat. Get either one wrong, and you get the symptom list above.
The critical detail is that not all rice starch is the same. Rice contains two kinds of starch molecules, and their proportions determine everything about how a grain cooks:
Amylose is a long, mostly straight chain that sets into a firm gel and resists dissolving. High-amylose rice cooks up fluffy and separate, with grains that hold their shape through cooking and cooling. Basmati is the classic example; standard long-grain white rice and most aged rices are also amylose-forward.
Amylopectin is a heavily branched molecule that absorbs water quickly, swells enormously, and forms a sticky, glossy gel. High-amylopectin rice is the clumping, creamy, spoon-sticky kind: sushi rice, arborio, glutinous ("sticky") rice, and most short-grain varieties.
This is why you cannot cook high-amylose basmati the same way you cook high-amylopectin sushi rice. Basmati wants enough water to gelatinize its amylose — but not too much, or the grains drown and split. Sushi rice wants more water absorbed into the grain and some gentle post-cook handling so the surface starch can build that cohesive, clump-friendly texture. The same stovetop ratio that gives you perfect basmati will give you dry, hard sushi rice; the ratio that's perfect for sushi will leave basmati chalky in the center. Our guide on basmati vs jasmine vs short grain breaks down which grain suits which dish.
In my baking work, we call this baker's math — expressing every ingredient as a percentage of the flour so recipes scale and troubleshoot cleanly. Rice works the same way. The water ratio is your recipe. Once you think of rice as a ratio problem rather than a "follow the bag" problem, every troubleshooting decision becomes mechanical.
And that leads to the deeper principle: water ratio controls texture. Time controls doneness. Heat controls how evenly water is distributed. And stirring is almost always wrong for rice.
When you stir rice after it starts simmering, you're not "preventing sticking" — you're physically abrading the swollen, fragile starch granules, rupturing them, and releasing their amylose into the cooking water. That released starch turns the water into glue, and the glue coats every grain. Stirred long-grain rice doesn't become fluffy; it becomes a sticky mass with a gummy texture. For long-grain rice, stirring is arguably the single fastest way to guarantee a mushy result.
Symptom 1: Rice Sticks to the Bottom
What you're seeing: A cement-like layer of rice fused to the base of the pot. The grains on top might be perfectly fine — or undercooked, if the pot ran dry.
Which variable is off: Water ratio (too low), heat curve (too high after the boil).
Why it happens: Starch gelatinization needs both water and heat. If the free water evaporates before the grains have absorbed what they need, the surface starch dries out and bonds directly to the hot metal. That bond is essentially a starch glue, and once it sets, no amount of scraping will un-set it. High heat accelerates the problem by driving evaporation faster than the grain can absorb water, so the bottom dries out while the top still looks raw.
The fix:
- Use the exact ratio for your grain and method. For stovetop white long-grain, that's 1.5 cups of water per cup of rice — not "a finger's width above the rice," not "whatever the bag says," not 2 cups. The ratio is the single most important number in rice cooking. Check the rice water ratio chart for your grain and device before you turn on the heat.
- Reduce the heat to LOW immediately after the first boil. The boil is a signal, not a cooking mode. Once water reaches a rolling boil, the rice needs a gentle simmer and a closed lid — not continued high heat.
- Do not stir after the boil. Stirring ruptures granules and releases starch that gums up the bottom even faster.
- Rest the pot for 10 minutes with the lid on after cooking. The steam redistributes moisture, and the bottom layer releases from the pot far more easily after a rest.
Pot material matters less than people think. A heavy-bottomed pot distributes heat more evenly and gives you a wider margin of error, but a thin pot with the correct ratio and correct heat curve will still cook fine. The ratio and the heat are the fix; equipment is just insurance.
The most common road into this symptom: using the old 1:2 ratio on the stovetop (too much water — see the myth section below) or using a correct ratio but never dropping the heat. If the bottom sticks, the diagnosis is almost always "not enough water for this grain + method" or "heat never dropped." For the full rinse-and-soak context — rinsing removes the loose surface starch that can also form that gummy base layer — see should you wash or soak your rice.
Symptom 2: Rice Turns Mushy, Gummy, or Split
What you're seeing: Porridge texture. A gluey coating on every spoonful. Grains split lengthwise, or disintegrate into paste.
Which variable is off: Water ratio (too high) — or agitation (stirring).
Why it happens: When starch granules absorb more water than they can hold, they rupture completely. The amylose floods into the cooking liquid, turning it into a gel, and the grain structure collapses into mush.
Here's the part that surprises people: this is almost never a time problem — it's a hydration problem. You can cook rice for an hour at the correct ratio and get firm grains. You can cook the same rice for 15 minutes in too much water and get glue. Time controls doneness. Water controls texture. They are different dials, and confusing them is how a lot of rice gets ruined.
The sneakiest version of this failure: using a stovetop ratio in a pressure cooker. A pressure cooker has zero evaporation — no steam escapes, so every drop of water you add stays in the pot. The stovetop ratio of 1.5 for white long-grain assumes you'll lose some water to steam. In a sealed pressure cooker, that same ratio is roughly 50% too much water, and it produces a pot of mush every single time. You didn't use too much water — you used the stovetop ratio in a pressure cooker. Those are different recipes.
Also guilty: leaving cooked rice on the Keep Warm setting for an hour or more, which slowly breaks down cell walls and turns perfectly good rice to paste. And stirring long-grain rice, as covered above.
The fix:
- Cut the water to the device-appropriate ratio. In a pressure cooker, that's 1:1 for most white rices and 1.25 for brown long-grain. On the stovetop, it's 1.5 for white long-grain and 2.25 for brown. The pressure cooker rice guide and the rice water ratio chart have every grain and every device. And if Instant Pot rice comes out mushy, reduce the water by 2 tablespoons next batch.
- Never stir long-grain rice after the boil. Short-grain sushi rice gets a gentle fold with a damp paddle after cooking — that's how you build its sticky texture on purpose. Long-grain wants to be left completely alone.
- Rest it properly instead of serving directly from the steaming pot (more on this below).
Rescue: You can't uncook mush — no amount of heat or time will un-gelatinize starch. But you can redirect it. Mushy rice makes excellent congee (just add more liquid and simmer it into soup), a perfectly good base for fried rice (spread it on a sheet pan and let it dry out first), or a thickener for soups and casseroles. It's not a waste; it's a different meal. For the right way to reheat the good batches — and handle the leftovers safely afterward — see how to reheat rice and how long does cooked rice last.
Symptom 3: Rice Burns or Scorches
What you're seeing: A dark, caramelized or charred bottom layer. A bitter flavor that perfumes the whole pot. Smoke curling out from under the lid.
Which variable is off: Heat curve (never reduced) and/or water ratio (too low).
Why it happens: The bottom layer of rice sits on the hottest surface in the pot. If the heat stays high after the boil, the water at the bottom evaporates completely, and the starch — no longer suspended in water — caramelizes and then scorches directly on the metal. What you're smelling is burnt starch, and it's bitter because caramelization past a certain point produces acrid compounds.
The classic path to this failure: bring the water to a boil on high, intend to turn it down, get distracted folding laundry, and come back to a smoke-filled kitchen. The heat curve is the variable. Rice needs a brief, controlled boil to start gelatinization — and then an immediate, dramatic drop to the lowest simmer.
The fix:
- Bring to a boil on high, briefly. The moment you see a vigorous boil, reduce the heat to the lowest setting your stove can hold and cover the pot immediately. This is the absorption method, and it's the backbone of nearly every reliable stovetop rice technique. In my baking world, we'd call this a controlled thermal profile — the same reason bread goes into a hot oven and then the temperature drops: structure needs an initial push, not sustained abuse.
- Check your ratio. Too little water means the bottom runs dry before the grains finish absorbing — the same failure signature as sticking, progressed further into burning.
- Rest the pot, lid on, for 10 minutes. The bottom layer will steam loose from the metal, and you'll frequently rescue the top 80% of the pot. Use a wooden spoon to separate the good rice from the scorched layer. The burnt crust is genuinely bitter — don't stir it into the rest.
One honest note: there's a world of difference between failure-burning and an intentional crispy bottom. Tahdig, nurungji, and socarrat — the beloved crisp rice crusts of Persian, Korean, and Spanish cooking — are made by controlled timing and a short blast of heat at the true end of cooking, after the rice is fully cooked and excess moisture has evaporated. That's a deliberate finish, not an accident. If you want to try it, use a heavy pot, cook the rice normally, then add a little oil around the edges and raise the heat for just 2–3 minutes at the very end. That's a technique. What we're troubleshooting here is the unplanned scorch. The rice cooking methods compared guide walks through both.
Symptom 4: Rice Boils Over / Overflows
What you're seeing: Foam and starchy water bubbling over the lid onto the stovetop. Sometimes the lid is literally dancing on the pot.
Which variable is off: Surface starch + trapped steam.
Why it happens: Rice grains carry a fine dust of broken starch fragments on their surface — the residue of milling and handling. When you add water and bring it to a boil, that surface starch dissolves and creates foam. High heat drives rapid boiling, and the bubbles multiply. A tight-fitting lid traps the foam and lets it build until it lifts the lid and spills over the sides. It's a volume problem: too much foam, not enough room in the pot.
The fix:
- Rinse the rice. Two to three rinses in cold water — swish, pour off the cloudy water, repeat — removes most of the surface starch dust and eliminates the foam at its source. This is the simplest, most effective fix for boil-overs. Rinsing also improves texture for many rices: rinsed long-grain cooks up with more separate grains, which is why the ratio guides in our should you wash or soak rice guide adjust slightly for rinsed batches. Rinsing isn't punishment; it's washing off the dust that causes sticking and foaming.
- Reduce heat after the first boil. A rolling boil turns a few bubbles into a foam avalanche. A gentle simmer produces far less foam.
- Crack the lid or use a wider pot. Until the foam settles — usually in the first few minutes of simmering — leave the lid slightly ajar or off-center so steam can escape instead of building pressure under the lid. A taller or wider pot gives the foam room to rise and collapse without escaping.
How the Cooking Method Changes Everything: The Universal-Ratio Myth
Now the big picture, because the most common rice failures come from one piece of inherited misinformation — not from anything you did in the moment.
Western home cooks grow up on "the universal 1:2 rice-to-water ratio" printed on every bag of rice. It's repeated in family recipes, cookbooks, and internet comments alike. And it is wrong for most grains and most cooking methods.
That ratio dates from an era when American kitchens bought a single variety of parboiled long-grain rice and cooked it one way on the stovetop. It was never designed for jasmine, never designed for sushi rice, and never designed for a pressure cooker. But it survives because it's on the package, and packages are trusted.
Here's what the package never tells you: the correct ratio depends on the grain and the cooking method, because each method loses a different amount of water to evaporation.
- Stovetop (open pot, lid on after boil): Evaporation happens freely during the boil and simmer. Ratios are relatively high — 1.5 for white long-grain, 1.25 for jasmine, 2.25 for brown long-grain — because a chunk of that water leaves as steam. This is the most forgiving method: if you overshoot the water slightly, extra steam carries the error away and you still get decent rice. Bring to a boil, cover, reduce to LOW, and don't peek.
- Rice cooker (fixed temperature curve, partial evaporation): The machine runs a controlled heating cycle and vents some steam — but far less than an open stove. Ratios drop below stovetop: 1.25 for white long-grain, 1.1 for sushi, 1.75 for brown long-grain. The fixed temperature curve removes the heat variable from your hands entirely, which is why rice cookers are so forgiving for beginners. White rice typically cooks in 15–25 minutes depending on batch size; brown takes 35–50. And give it a 10-minute rest after the beep.
- Pressure cooker (fully sealed, zero evaporation): Every drop of water you add stays in the pot, and high pressure drives water into the grain faster than stovetop cooking. Ratios are dramatically lower: 1:1 for white long-grain, 1.25 for brown long-grain. Cook times are short — about 3 minutes at high pressure for white long-grain, then a 10-minute natural release; 22–24 minutes for brown with a full natural release. Using a stovetop ratio here guarantees mush. The pressure cooker rice guide has the full Instant Pot method.
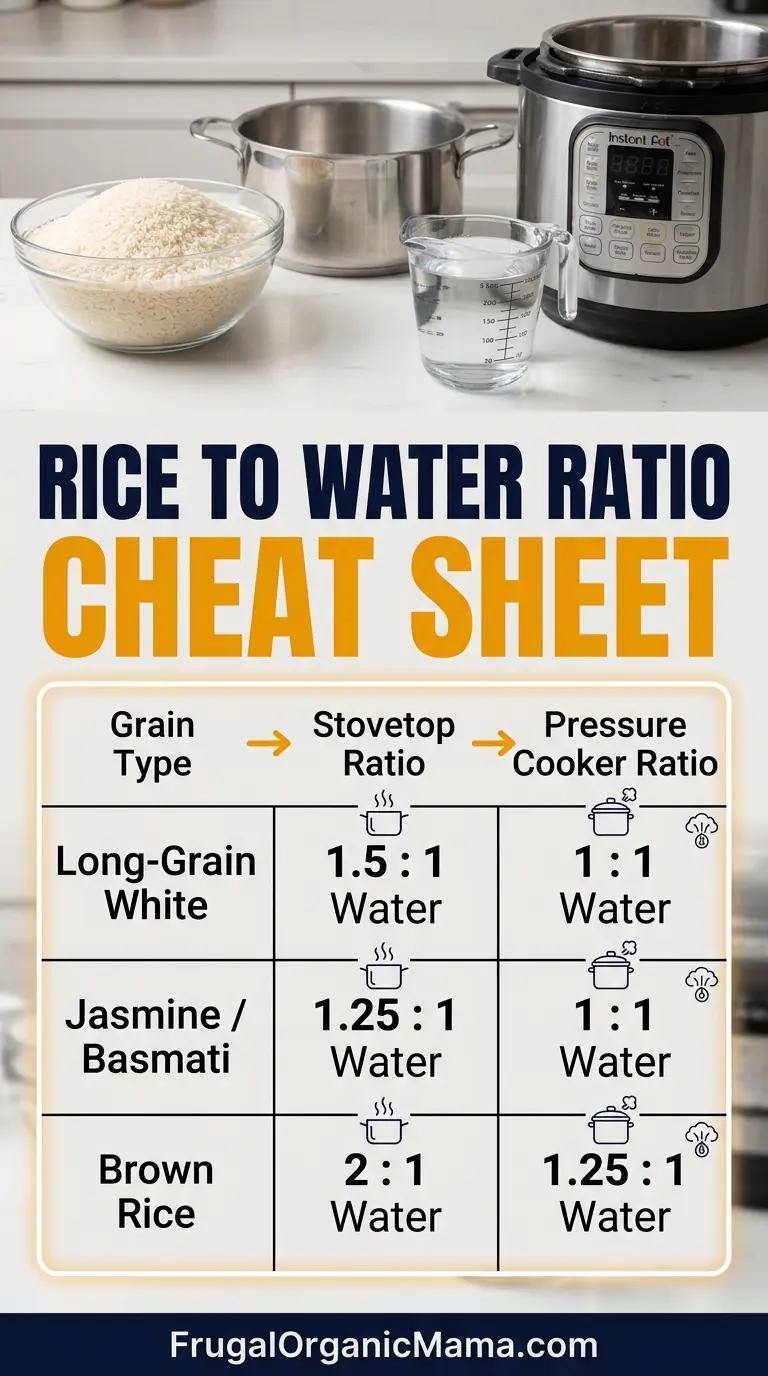
The same 1:2 stovetop ratio that barely works on the stove completely ruins rice in a pressure cooker, and the same 1.5 ratio that's right for stovetop white long-grain is too much for jasmine on the same stovetop. There is no universal ratio. There's a ratio for your grain and a ratio for your device — and the rice water ratio chart has them all in one place. The rice cooking methods compared guide explains why each method behaves the way it does.
The Rest Step: The Most Underrated Technique in Rice Cooking
We've mentioned it in every fix so far, so let's give it its due: the rest step prevents more rice failures than any other single technique.
Rice doesn't stop cooking the second you turn off the heat. The residual heat inside the pot — and the steam trapped under the lid — continues to gelatinize starch and redistribute moisture for several minutes. If you serve immediately, you get wet, uneven rice: sticky on top, dry and stuck on the bottom. If you rest it, lid on, for about 10 minutes for white rice (10–15 for brown), the moisture equalizes across the entire pot. Grains firm up, the bottom layer releases, and the texture transforms.
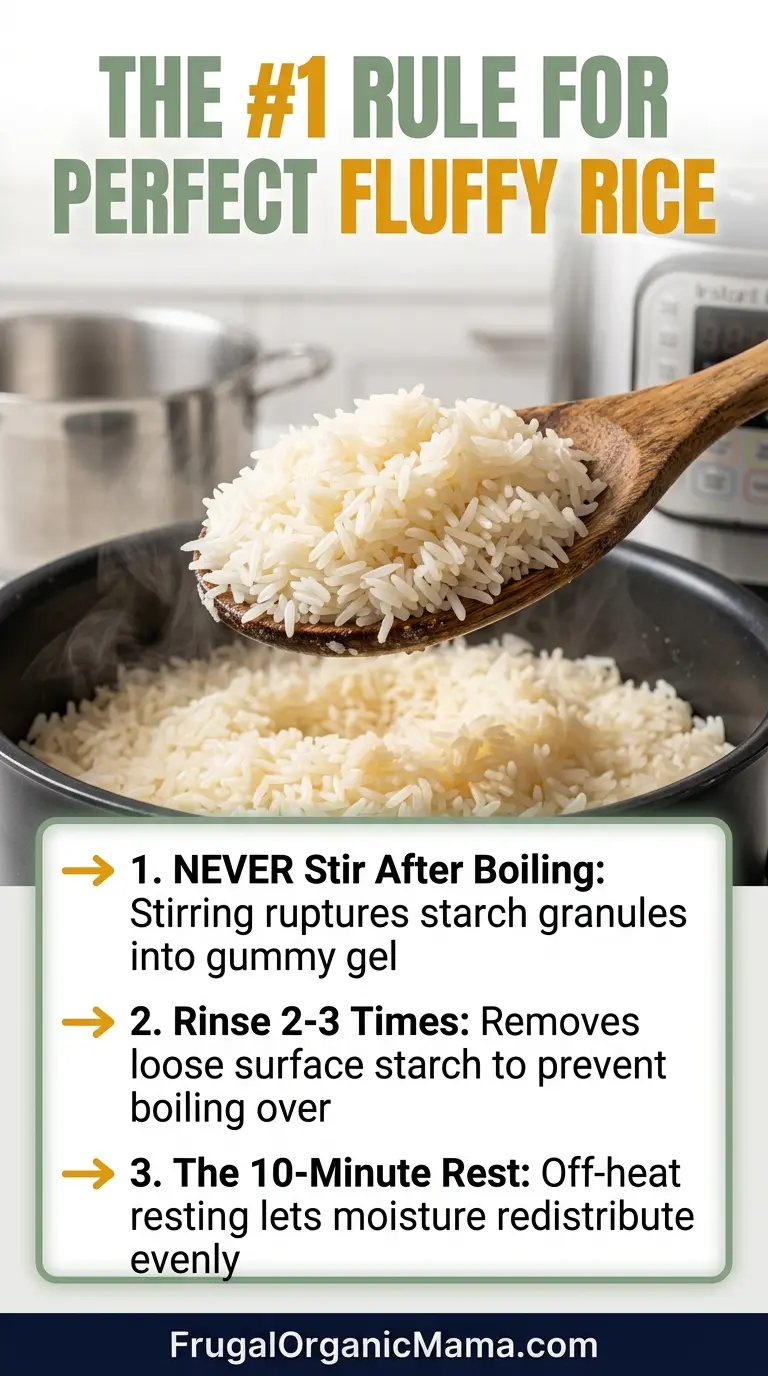
Resting also saves fuel, which matters in a frugal kitchen. When you turn off the heat and let the rice finish in its own residual warmth, you're using zero additional energy. It's a free improvement that costs you ten minutes of doing literally anything else.
Skipping the rest is how a surprising number of rice failures happen. The wet top, the stuck bottom, the "still hard in the middle" panic — all of them are made worse by serving too fast. And the panic re-cook, adding more water to a pot that's already mostly done, is exactly how you produce mush in the end. Rest the pot. Every time.
The Frugal Bottom Line
Every failed pot of rice costs you three things: at least a cup of grain, the fuel it took to cook (and then scrub) it, and fifteen minutes of your life at the sink. That's the real price of rice trouble — and for a frugal, waste-conscious kitchen, it's worth avoiding.
The good news: the two highest-leverage fixes cost nothing. Correct ratio. Rest step. That's it. No special equipment, no fancy rice, no secret ingredient. Measure the water, drop the heat, walk away, rest the pot.
Here's your practical decision rule — diagnose in this order:
- STICKING at the bottom → your water ratio is too low for this grain + method (check the ratio chart), and/or your heat stayed too high after the boil. Drop to LOW after the first boil, stop stirring, rest 10 minutes.
- MUSHY / GUMMY / SPLIT → your water ratio is too high — or you used a stovetop ratio in a pressure cooker (zero evaporation there). Cut the water to the device-appropriate ratio, and never stir long-grain.
- BURNED / SCORCHED → your heat never dropped to a simmer, or the bottom ran dry. Lower the heat instantly after the first boil, add the correct water, and rest.
- BOILS OVER → too much surface starch (unrinsed rice) plus trapped steam. Rinse the grain 2–3 times, reduce the heat, and crack the lid until the foam settles.
If you're ever in doubt, plug your numbers into the Rice Water Ratio Calculator — it gives you the exact ratio for your grain, quantity, and device, so you can stop guessing and start cooking.
Rice isn't a gamble. It's a chemistry experiment where water is the only dial that matters most — and now you know which way to turn it. The four symptoms are just four readings on that dial. Find the symptom, fix the variable, rest the pot. That's the whole method. And once you see it work — once you measure the ratio, drop the heat, stop stirring, and watch a pot of rice steam itself into perfect, separate grains — you'll never go back to crossing your fingers.
For more from the Rice Science Hub — grain-by-grain ratios, cooking-method breakdowns, and storage guidance — browse the full library.
Frequently Asked Questions
Q: Why does my rice stick to the bottom of the pot? A: Rice sticks when the water ratio is too low or the heat stays too high after the boil. If free water evaporates before the grains finish gelatinizing, the surface starch dries out and bonds to the hot metal. Fix it: use the exact ratio for your grain and device, drop the heat to LOW immediately after the first boil, stop stirring, and rest the pot for 10 minutes.
Q: Why is my rice mushy even when I follow the package? A: Mushy rice is almost always a hydration problem, not a time problem — the granules absorbed more water than they could hold and ruptured. The sneakiest cause is using a stovetop ratio in a pressure cooker, which has zero evaporation. Cut the water to the device-appropriate ratio and never stir long-grain rice after the boil.
Q: Why is my rice gummy and sticky instead of fluffy? A: Gummy, sticky rice comes from too much water or from stirring after the boil. Stirring rips open swollen starch granules and releases amylose into the cooking water, which turns the liquid into glue that coats every grain. For long-grain rice, leave it completely alone once it starts simmering.
Q: Why does my rice burn on the bottom? A: Rice burns when the heat never drops after the boil. The bottom water evaporates, and the dry starch caramelizes and scorches directly on the metal. Bring the water to a boil briefly, then reduce the heat to the lowest setting and cover immediately. A correct ratio and a 10-minute rest will also protect the bottom layer.
Q: Why does my rice boil over on the stove? A: Rice boils over when surface starch dust dissolves into foam and a tight lid traps the steam. Rinse the rice 2–3 times to wash off the starch dust, reduce the heat after the first boil, and crack the lid until the foam settles.
Q: Can I fix mushy rice? A: You can't uncook mush — no amount of heat or time will un-gelatinize starch. But you can redirect it: mushy rice makes excellent congee, a good base for fried rice (spread it on a sheet pan to dry first), or a thickener for soups and casseroles. For the safe way to handle the good leftovers, see our guide on how long does cooked rice last.
Q: Why does rice stick in my rice cooker or Instant Pot? A: In a sealed pressure cooker, every drop of water you add stays in the pot, so you need far less water than stovetop. Using the stovetop ratio in an Instant Pot produces mush. Use the lower pressure-cooker ratio, use natural release, and don't stir before cooking. If Instant Pot rice comes out mushy, reduce the water by 2 tablespoons next batch.
Q: Do I need a different water ratio for each cooking method? A: Yes. Each method loses a different amount of water to evaporation: stovetop loses the most (highest ratios), a rice cooker loses some (middle ratios), and a pressure cooker loses none (lowest ratios). There is no universal 1:2 ratio — the correct ratio depends on your grain and your device. See the rice water ratio chart for the full breakdown.
Q: Should I rinse rice before cooking? A: Rinsing 2–3 times removes the loose surface starch that causes sticking, gumminess, and boil-overs. It also helps most rices cook up with more separate grains. It's not punishment — it's washing off the dust that causes the two most common rice failures.
Q: How do I reheat leftover rice without drying it out? A: Add a little water (about a tablespoon per cup) and reheat with gentle, covered heat so the steam rehydrates the grains instead of blasting them dry. Our how to reheat rice guide covers the stovetop, microwave, and steamer methods. Since cooked rice is perishable, handle leftovers quickly and refrigerate within the safe window — see how long does cooked rice last.
Next batch: verify your water ratio before you heat the pot.
Wrong ratios cause most sticking, mushy, burnt, and overflowed pots. Get the exact number for your grain, quantity, and device before you start.
James Okonkwo is a Baking Science Contributor at Frugal Organic Mama. He treats the kitchen as a chemistry lab you can eat from — validating every FOM kitchen calculator against food-science benchmarks and explaining starch gelatinization and water absorption so a beginner can predict the outcome rather than just follow a recipe.